Mudule for 1C-Bitrix «cdnnow! — ускорение сайта» allows you to:
- speed up your website loading in different regions
- optimize images on your website on the fly
- significantly reduce outgoing traffic from your server
- reduce the number of requests to your server
- reduce the cost of AntiDDoS for your server
All this is achieved by automatically transferring copies (cache) of images, styles, and scripts to numerous cdnnow! CDN servers.
Connecting to cdnnow!
As a first step submit a request to connect to CDN or write us in the chat, indicating your email, site and your CMS — Bitrix.
You will receive an email with access to your personal account and the CDN address for your website.
Installing the “cdnnow! — website acceleration” module in Bitrix Site Management
- We recommend making a backup copy of your CMS before starting the integration.
-
Go to the “Administration / Marketplace / Solution Catalog
/ Integration / Other” section in your Bitrix Site Management panel
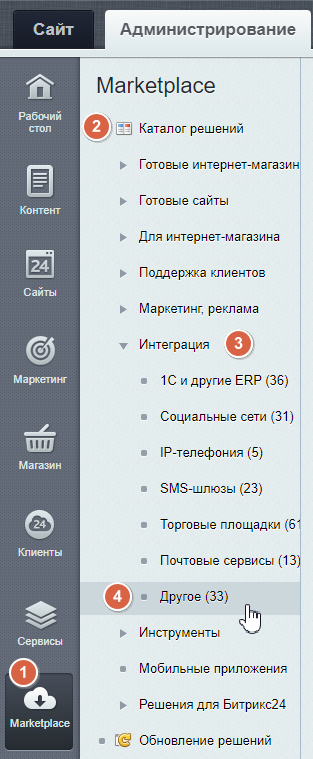
- The Marketplace catalog page will open
- Enter the name of the plugin “cdnnow!” in the search field and press Enter.
- Click “Install” next to the plugin icon.
- Click “Download” to download the plugin installation files. Accept the license agreement and wait for the download to complete.
- Click “Install” to install and add the plugin to the system.
- If you have done everything correctly, a notification will appear indicating that the plugin has been successfully installed.
Configuring CDN in the Bitrix module
1. Go to cdnnow! module settings:
- Open the “Administration / Settings” section
-
Go to the cdnnow! module
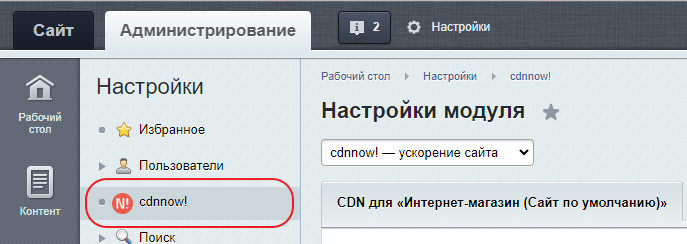
- You can also find it at: “Administration / Settings / Product Settings / Module Settings / cdnnow!”
If you have more than one site, each of them will have its own tab. We will discuss the nuances of CDN settings for multiple sites later.
2. Activate the CDN service by checking the checkbox and entering your CDN address in the field.

Now we're going to look at the configuration option with a service domain of the form userХХХХХ.nowcdn.co *, which was issued to you in your cdnnow! personal account, and then we will describe how to use your own domain for CDN.
* the service domain may also be in form userХХХХХ.nowcdn.co, where ХХХХХ — is your project unique number. Service domains of the form userХХХХХ.nowcdn.co and userХХХХХ.clients-cdnnow.ru are equivalent.
3. The next step is to select the file extensions on your website that will be distributed via CDN. We recommend enabling everything (as illustrated below).
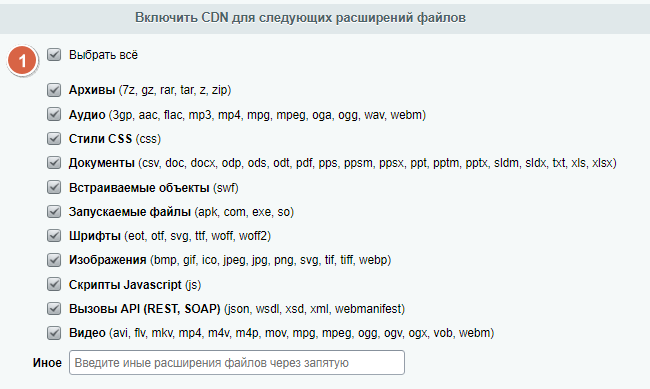
If you need to cache other file extensions see the description below in the article.
4. You can disable CDN for directories on the site if necessary. To do this, use the following module options:
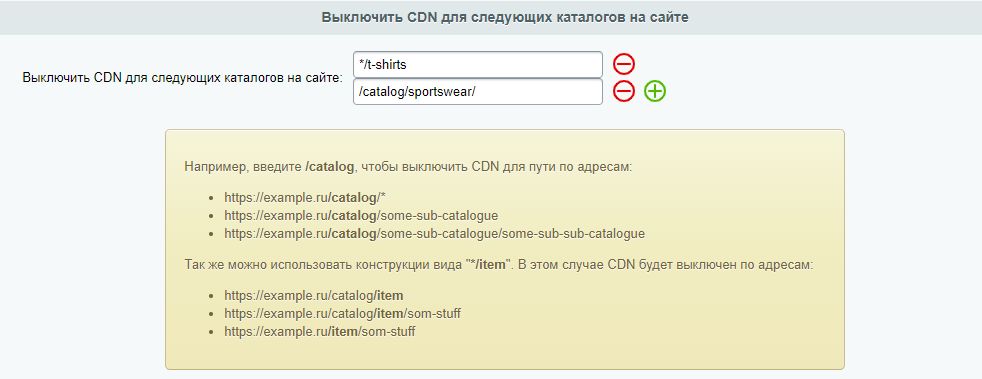
In each separate line, you can specify a directory from the URL (address) of the site, on the page of which CDN will not be applied. Lines can be added and deleted. The tooltip below the fields shows the rules for writing CDN disabling.
I n the example shown in the figure below, CDN is disabled on the following pages:
- for the first rule: example.com/t-shirts/ или, например, example.com/catalog/t-shirts/
- and in the second case, only at the address example.com/catalog/sportswear/
5. To apply the CDN settings click the «Apply» button at the bottom of the module page.

6. Make sure that the URLs in the site's HTML code have been correctly changed to CDN addresses.
To do this, you will need to open the “Developer Tools” panel in your browser. For most browsers, this is the F12 key on the keyboard, or the “Developer Tools” item in the browser settings, or the “Inspect Element” item in the context menu.
6.1. In the panel that opens, find the Elements or Inspector tab (item 1 in the pisture below), which displays the code of your website page:
6.2. Expand the "head" item (item 2).
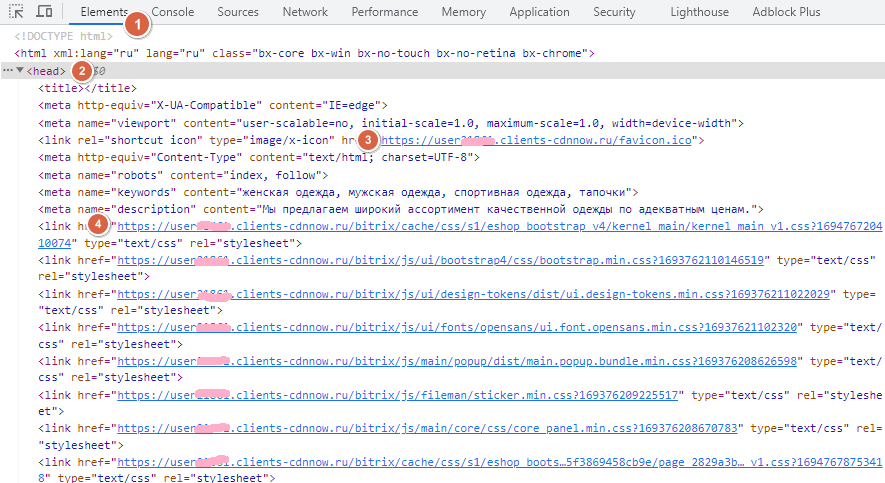
6.3. Links to static files should contain your CDN address (items 3 and 4). All static files on the page whose extension types you have marked for caching should be connected via the CDN address.
7. You can also check which files are loaded via CDN and which from your server using the Network tab in the same developer panel.
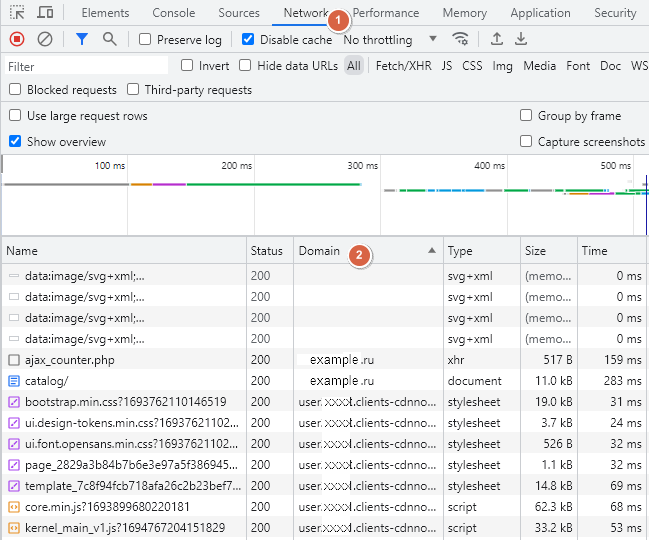
7.1. You can customize the table output by clicking on the table column headers — you
will need the Domain column, item 2.
If nothing is displayed in the panel, refresh the page.
By sorting by the Domain column, you can see which files are loaded from the CDN domain
and which from your domain. The more files are connected via CDN, the faster the page will load.
Advanced CDN settings in your cdnnow! account
How to cache other file types (other extensions)
If the listed file types do not include any specific extensions that are present on your website and you would like to distribute them via CDN, enter them in the «Other» field, separated by commas (item 2 in the illustration below).
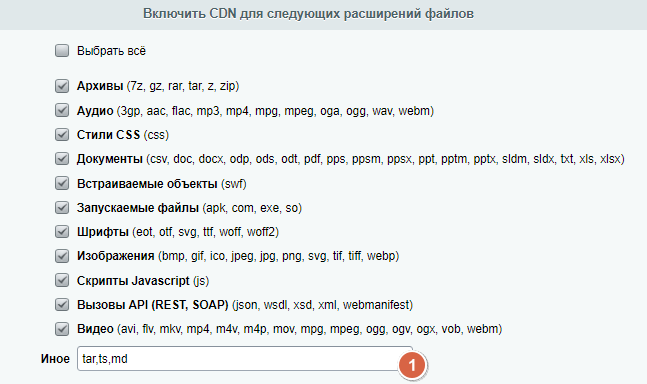
There is no need to put a dot before the extension. Only latin letters and numbers are allowed.
Additional configuration is required in your personal account at selfcare.cdnnow.pro. There are two ways to configure this: write to support, indicating your project number and the extensions you need to add for caching in the CDN. Or you can enable full caching of all files (including your website pages) yourself through your personal account settings. Please chech the steps below.
1. Go to your personal account at cdnnow.
2. In the left menu, go to the «Projects» section. Then go to your project by clicking on its name in the project table
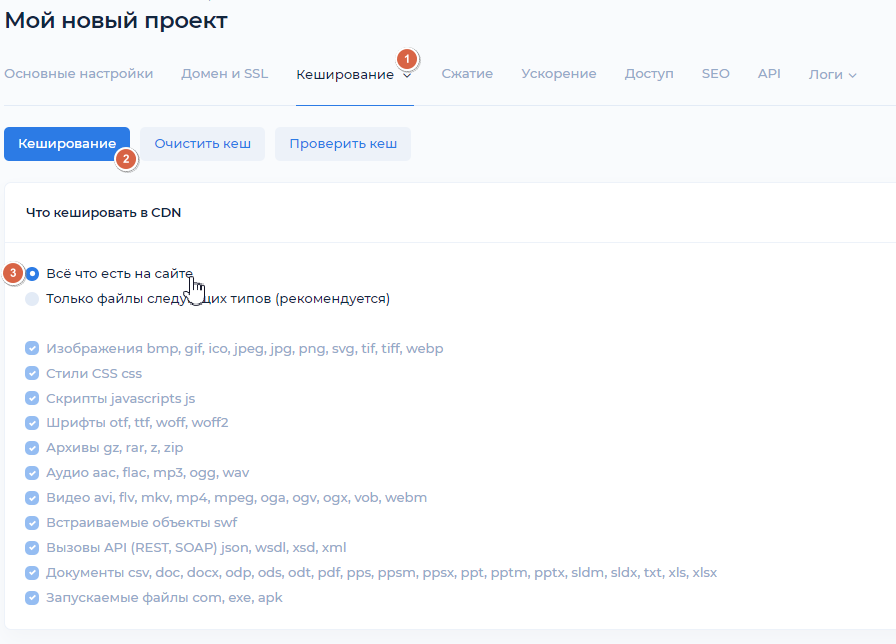
3. There are tabs on the project settings page. Go to the «Caching» tab, «Caching» subsection.
4. Enable the option to cache “everything on the site”
5. Save your changes (without publishing).
6. Publish your project. Publishing may take a few minutes. After publishing, all file types on your site will be available for caching.
Using your own domain for CDN
If you want to use your domain for CDN in the addresses of files hosted on cdnnow!,
for example, cdn.example.com instead of the default CDN project
address userXXXXX.nowcdn.co or userXXXXX.clients-cdnnow.ru,
follow the instructions below.
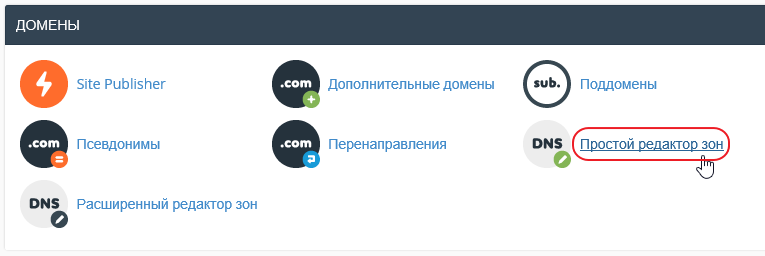
- Go to your hosting/VPS control panel. The screenshots are based on the cPanel hosting control panel.
-
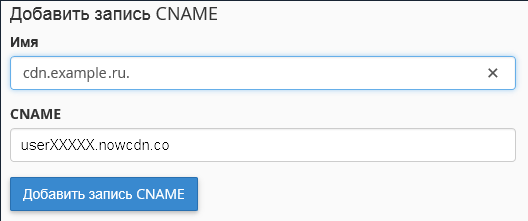
Open the DNS zone editor and add a new CNAME record.
In the «Name» field, enter the name of your subdomain for CDN.
Some control panels automatically add the domain and a period at the end.
In this case, just enter the word cdn.
In the «CNAME» field, enter your project's CDN address in the format userXXXXX.nowcdn.co or userXXXXX.clients-cdnnow.ru (you need to substitute your value from your cdnnow! account).
Save your changes. -
Updated CNAME record will appear in the record table.
DNS may take some time to update (from a few seconds to 72 hours).

- In your personal account selfcare.cdnnow.pro go to the “Projects” section in the left menu. Then go to your project by clicking on its name in the project table
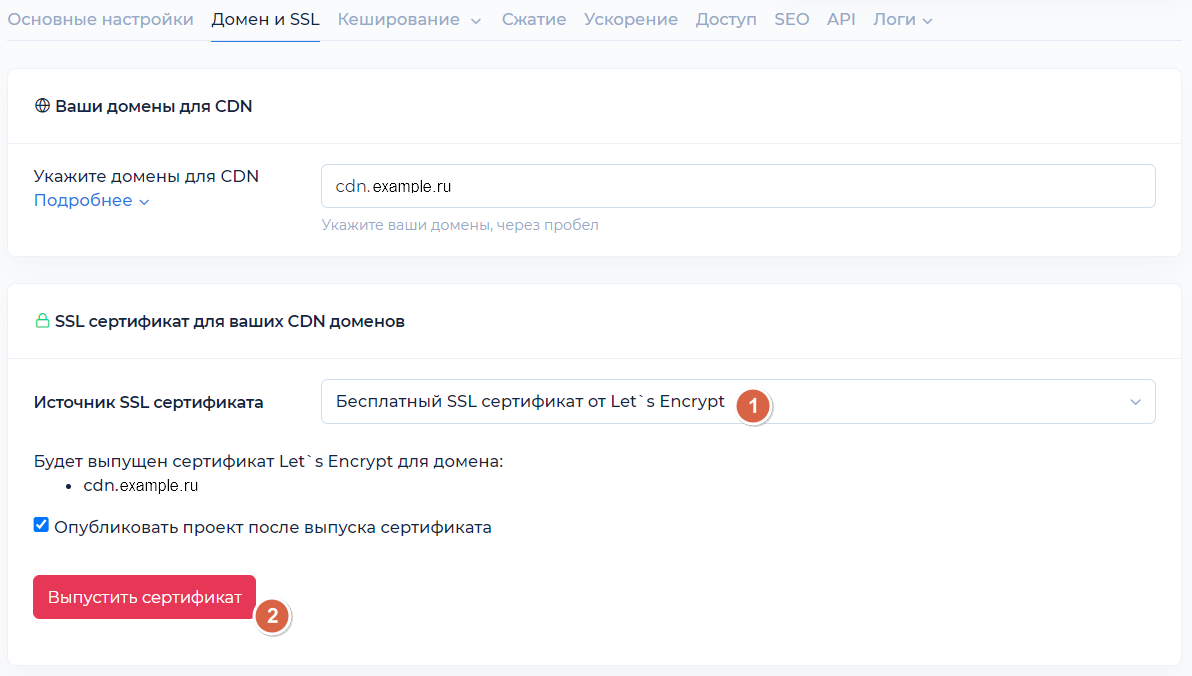
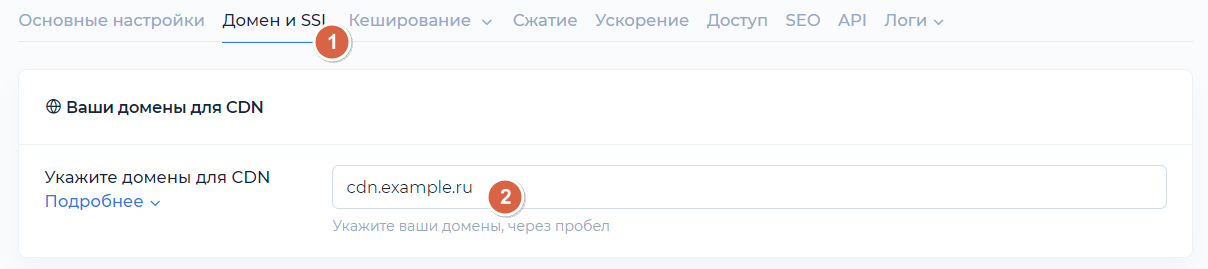
- There are tabs on the project settings page. Go to the “Domain and SSL” tab.
- Enter your domain for CDN in the field. If you have several domains for CDN, you have to enter them separated by spaces (a CNAME record must be created for each of them).
-
Below is an area for managing your SSL certificate. If your site runs on the https protocol,
you should issue or add a certificate for your CDN domain.
In this section, you can issue a free certificate from Let's Encrypt, which will be
automatically renewed every three months without your involvement.
-
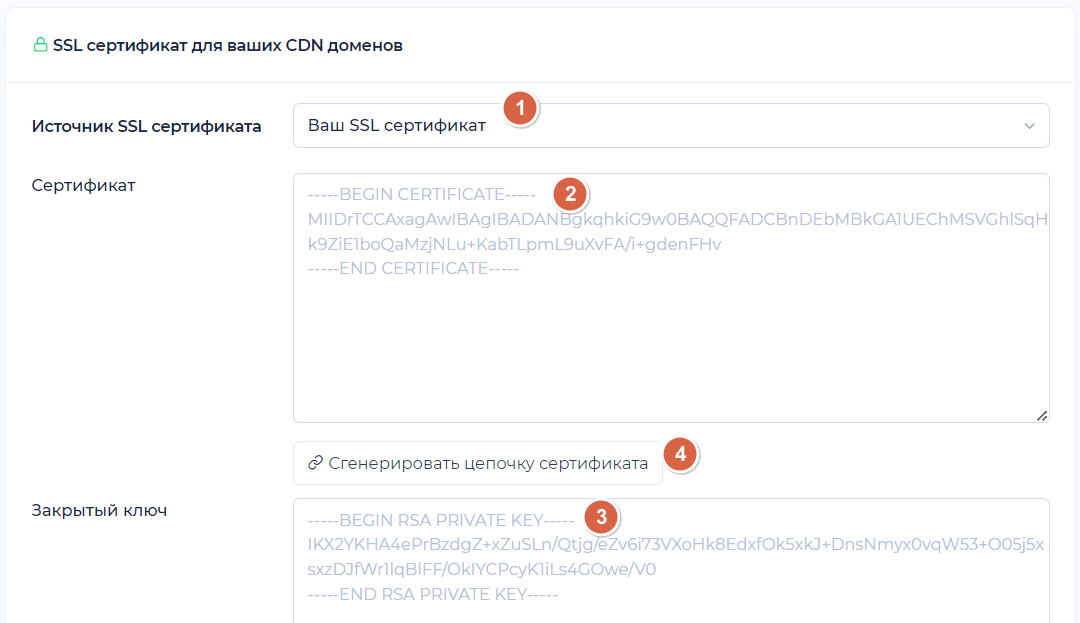
If you have your own certificate, you can add it in this section.
Here you need to insert the certificate itself and the private key. Also, click the “Generate certificate chain” button for correct operation. Save without publishing, and then publish the project.
-
After publishing the project, open your domain for CDN in your browser.
If the configuration is successful, you will see:
– The domain cdn.example.com (here is your domain for CDN) opens via the https protocol (if you issued/added a certificate).
– A 404 error may be displayed on the page. This is normal if only static content is cached, as the domain address for the CDN is a copy of your website's home page (pages are not cached in this case)
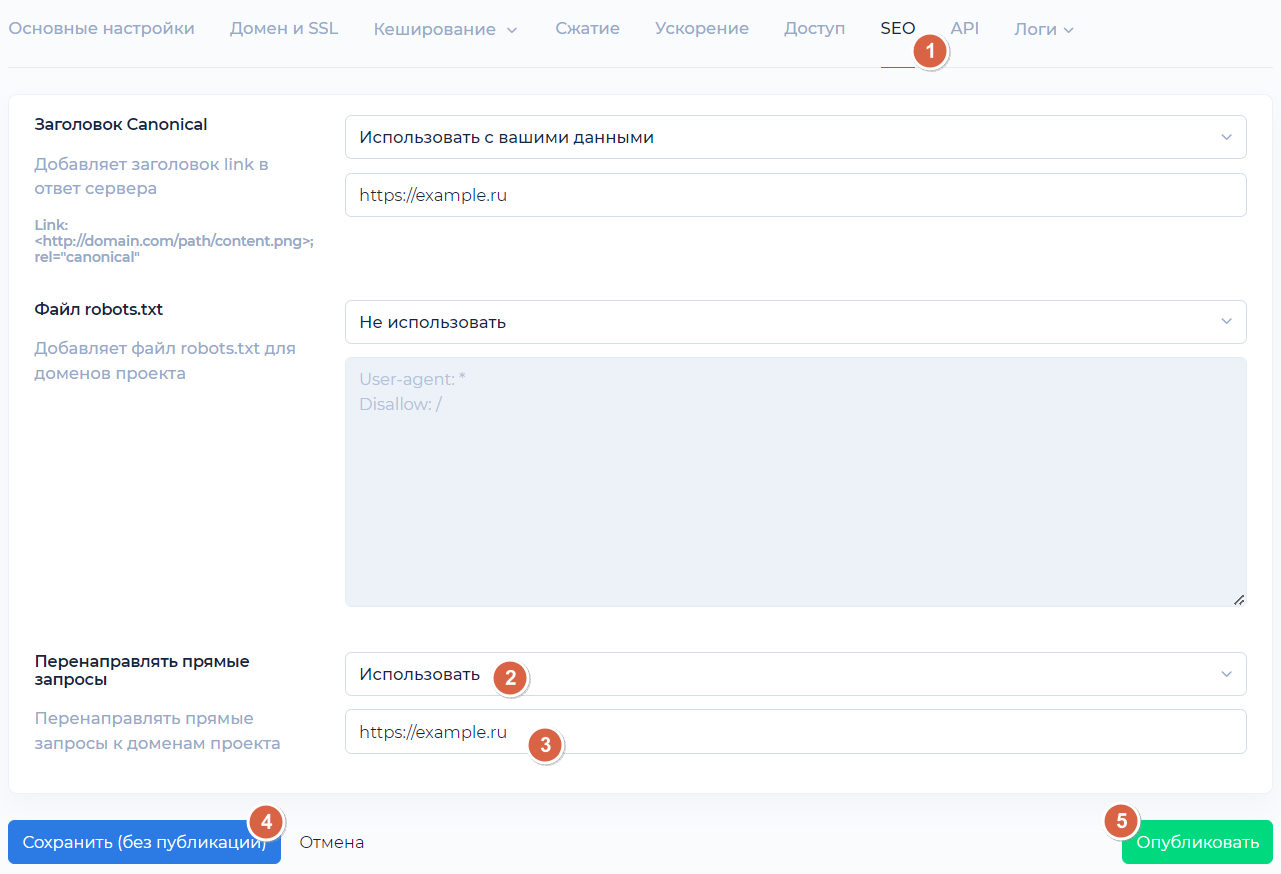
– If you have enabled full caching, a copy of your website's home page will be displayed. If you prefer to redirect to your main domain when accessing the CDN domain via a direct link, you can configure this in the Control Panel on the SEO tab. Enable the “Redirect direct requests” option and specify your parent domain. Save and publish the project.
Images optimization settings
We've got a detailed article about the advantages of the image optimization service. Here we will describe how to enable this option in your project
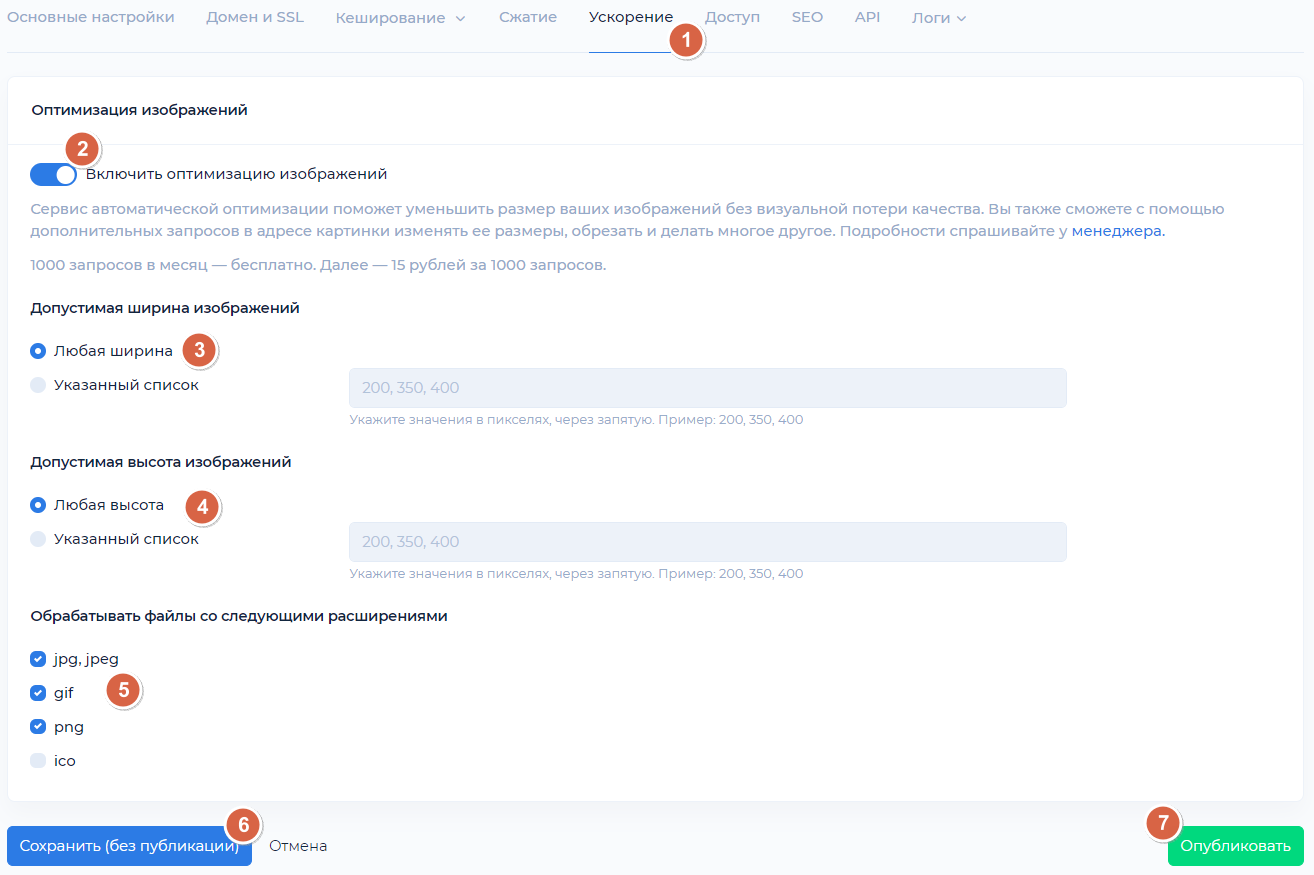
- Go to the «Acceleratiom» tab in your project's personal account at selfcare.cdnnow.pro
- Enable the image optimization feature.
- If you do not know all the image sizes on your website, leave the “Any width” and “Any height” parameters as they are.
- If you know the sizes of your images, you can specify the corresponding parameters in the fields. Optimization will only occur for these sizes (items 3 and 4 in the figure).
- Select the image extensions (item 5) that you want to optimize on your website. .ico files should not be optimized if they contain transparency
- Save (item 6) and publish (item 7) the project.
- After publishing the project, your images on the website will load even faster due to on-the-fly conversion to webp format. The image extensions will remain the same. The image size (in bytes) will decrease without compromising quality
- No configuration is required in the Bitrix module
If you have multiple sites in your Bitrix panel
If all your sites are on the same domain, then one project in cdnnow! is enough, but this is rare case. Please consult cdnnow! support via chat or email in case of difficulties.
In most cases different sites have different domain names. In this case, you need to create several different projects in your cdnnow! account. Each project will have a unique CDN address.
In the Bitrix control panel, in the cdnnow! module settings, you will have a separate tab for each of your websites.
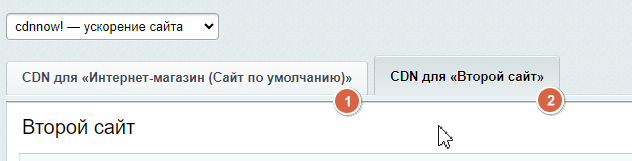
You can enable and disable CDN separately for each website; the settings for one will not affect the settings for others.
Cost of CDN services
We provide a free 7 days trial for all our new clients. When you get access to your personal account you also get unlimited access to CDN and image optimization features. During the trial period, you can thoroughly test the download speed; we do not limit the functionality for trial accounts.
If you like our service and are ready for long-term cooperation, we will convert your account from trial to normal.
The cost of placing data in CDN depends on the amount of traffic. You can check your traffic usage during the trial period in your personal account in the “Statistics” section and calculate how much traffic is expected per month. In this section, you can see the volume of requests for image optimization, if you have enabled this feature.
Тарифы
Starting at $8/month — includes
1000 GB. Unlimited projects
Minimum monthly prepayment of $8. Includes 1000 GB of traffic.
Excess usage is billed postpaid on a tiered pricing model. Enter your monthly traffic volume in gigabytes.
Each plan includes up to 100 000 optimization requests per month
then $1.12 / 10 000 requests
If you have any questions about setup, maintenance, or pricing, you can always contact our support team:
- Email: sales@cdnnow.pro
- The chat at the bottom of the page