Contents
To connect CDN on the Joomla platform, you need to use plugins. Unfortunately, we don't have our own plugin, but we will review a couple of well-known plugins on the Joomla market.
Connecting your site to CDN allows you:
- speed up your website's loading time in different regions;
- optimize images on your website on the fly;
- significantly reduce outgoing traffic from your server;
- reduce the number of requests to your server;
- reduce the cost of AntiDDoS for your server.
All this is achieved by automatically transferring cache copies of images, styles, and scripts to numerous cdnnow! CDN servers.
Creating a CDN Account
If you don't yet have a cdnnow! account, submit a CDN activation request, by providing your email, website, and CMS.
You will receive an email with access to your Control Panel and a default CDN address for your project in the format userXXXXX.nowcdn.co or userXXXXX.clients-cdnnow.ru, where userXXXXX — is your unique identifier.
Connecting to CDN in Joomla
The cdnnow! team are not experts in Joomla CMS or the authors of the plugins described here. We provide these CDN connection settings as recommendations only and cannot be fully responsible for the accuracy of the instructions, as the plugins are updated and modified by their authors.
We recommend that you make a backup of your CMS before starting the integration.
Log in to your Joomla admin panel.
Below, we will look at connecting via two plugins: CDN for Joomla and JCH Optimize .
1) Connecting with „CDN for Joomla“ plugin
This plugin has a free version. However connecting to CDN over https is only available in the paid version.
Download the plugin: CDN for Joomla
Go to the extension installation page by selecting Main menu → Extensions → Extensions manager → Install.
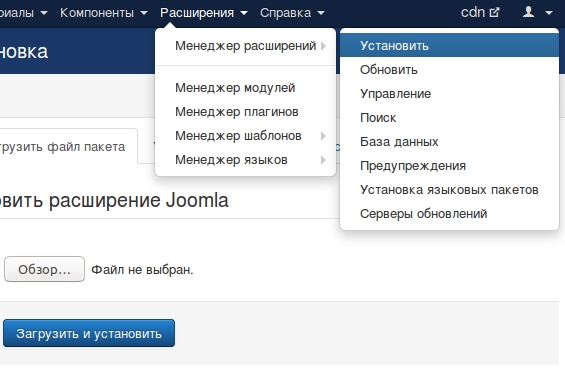
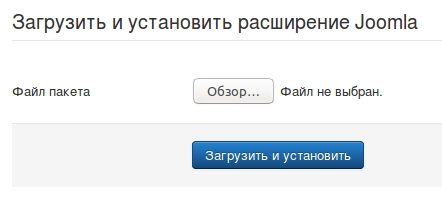
On the extension installation page, select the plugin file you downloaded (by clicking the «Browse» buttin), and click «Download and Install» button.
A message should appear stating that the plugin has been successfully installed.
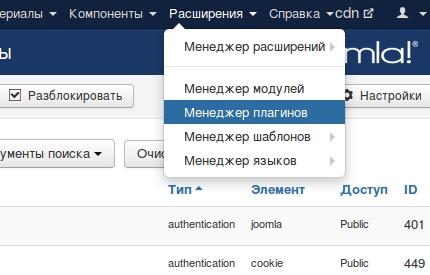
Go to the plugin page:
- Go to the plugin manager page by selecting Main menu →
Extensions → Plugin manager
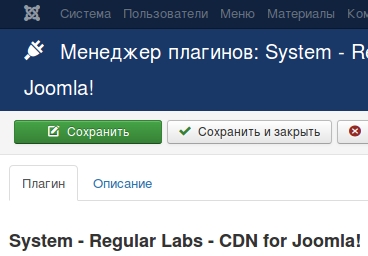
-
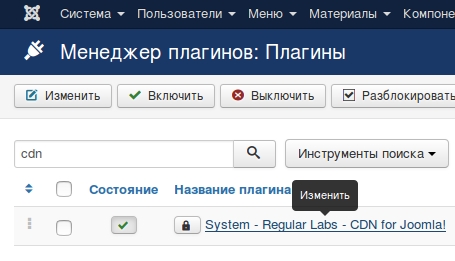
In the plugin manager window, select the «System - Regular Labs - CDN for
Joomla!» plugin.
Configure plugin:
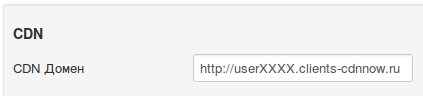
-
In the «CDN Domain» field enter the CDN domain address (userXXXX.nowcdn.co,
where userXXXX — is the service name of your project in your cdnnow personal account.
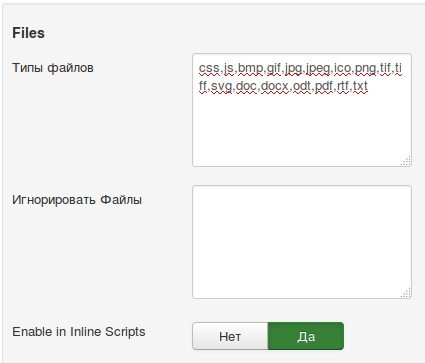
-
Specify the desired file types (separated by commas) for caching on your website in the
«Files» section.
- If necessary, fill in the «Website root» field.
Save the settings by clicking the «Save» button.
The address of static resource files in your website's HTML code should change.
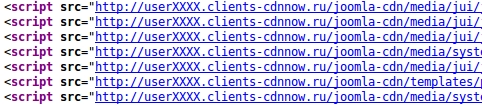
This completes the installation and configuration, and the CDN module is ready to use.
Check the website
Refresh your website page; it should display correctly. If your website only uses an HTTPS connection, you will most likely need the paid version of the plugin, which supports HTTPS.
2) Connection with „JCH Optimize“ plugin
The plugin authors claim that this plugin supports connections to various CDN providers.
Full documentation is available in English.
Download the plugin: JCH Optimize
Go to the extension installation page by selecting Main menu → Extensions → Extensions manager → Install.
On the extension installation page, select the plugin file you downloaded (by clicking the «Browse» button), and click «Download and Install».
A message should appear stating that the plugin has been successfully installed.
Go to the plugin page:
- Go to the plugin manager page by selecting Main Menu →
Extensions → Plugin manager
- In the plugin manager window, select the «JCH Optimize» plugin.
-
In the plugin options, enable the «Use CDN» option
-
In the plugin settings tabs, go to the CDN tab (1).
Here, configure the CDN as follows: -
(2) – activate CDN for the site,
(3) – specify which protocol the CDN connects to. If your site always runs on https, specify https,
(4) – in the Domain 1 field, specify your CDN address without the protocol, where XXXXXX is your unique value from selfcare.cdnnow.pro,
(5) – specify the file types for caching. Leave everything enabled by default,
(6) – here you can specify additional file types for caching. This field may be disabled in the free version of the plugin. See also our article on How to cache other file types (other extensions) - Often, when checking whether CDN is connected in the site code, we may not notice any changes. Clear your browser cache, and if that doesn't help, clear the cache in Joomla.

The address of static resource files in your site's HTML code should change.
This completes the installation and configuration, and the CDN module is ready to use.
Check the website
Refresh your website page; it should display correctly.
See also:
- Use your own domain for CDN
- Image optimization settings
- How to cache other file types (other extensions)
Cost of CDN services
We provide a free 7 days trial for all our new clients. When you get access to your personal account you also get unlimited access to CDN and image optimization features. During the trial period, you can thoroughly test the download speed; we do not limit the functionality for trial accounts.
If you like our service and are ready for long-term cooperation, we will convert your account from trial to normal.
The cost of placing data in CDN depends on the amount of traffic. You can check your traffic usage during the trial period in your personal account in the “Statistics” section and calculate how much traffic is expected per month. In this section, you can see the volume of requests for image optimization, if you have enabled this feature.
Prices
Starting at $8/month — includes
1000 GB. Unlimited projects
Minimum monthly prepayment of $8. Includes 1000 GB of traffic.
Excess usage is billed postpaid on a tiered pricing model. Enter your monthly traffic volume in gigabytes.
Each plan includes up to 100 000 optimization requests per month
then $1.12 / 10 000 requests
If you have any questions about setup, maintenance, or pricing, you can always contact our support team:
- Email: sales@cdnnow.pro
- The chat at the bottom of the page